Tools:

  • Scissors (for use on fabric)
  • Measuring Tape
  • Stapler (regular office style paper stapler)

Supplies & Materials:

  • Floral ribbon, preferably 2"or more
  • Tie Wraps (the ones used for garbage bags)


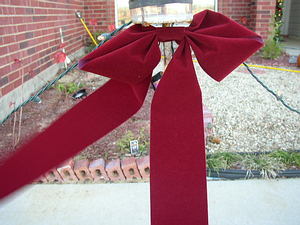
Simple Holiday Bow on an outdoor candleholder

Holiday Bow

Here is a simple holiday bow that is made out of velour ribbon. Only a couple of easy steps are required to create these bows and a lifetime to enjoy! If you are looking for just a basic (outdoor) ribbon bow, then just follow the instructions below.


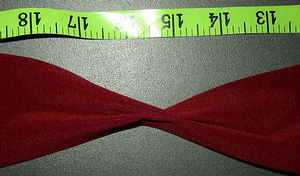
Measure to 16"

Step 1
(You can use any type of ribbon, in this demonstration we will be using Velour ribbon with a width of 2½".)

Working straight from the ribbon roll, without cutting yet, measure to 16" from end of ribbon. You can either mark with colored pen or just hold in position with finger. This is where we will be starting the first "pinch" to make the bow.

Create the "M" shaped pinch here

Step 2

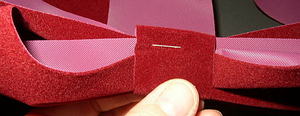
To make the bow "pinch", gather the ribbon between your index finger and thumb. The bow will have two halves or humps (kind of like paper airplanes are made). Another way to think of it is like a "M" shape. Staple with the "pinch" in place. This will secure it for later use.

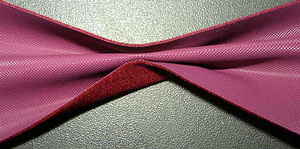
Back of "M" pinch

Step 2a

This is a picture of the back of "M" pinch. See how it forms a bowtie shape? This is what helps create the bends in the bow.

Create the 2nd and 3rd pinch

Step 3

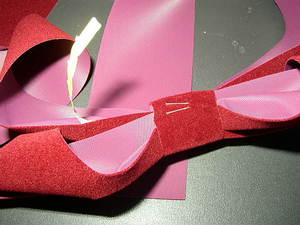
Now measure 10" from first "pinch" and repeat Step 2 above two times. In all you should have 3 "pinches". These will form the bow's center.

Forming the bow

Step 4

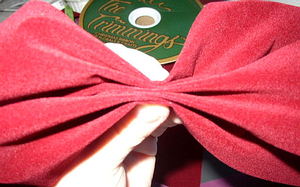
Now gather the "pinches" in this order:
1.)First pinch on bottom (this is the first one we did 16" from ribbon end)
2.) Second pinch on top
3.) Third pinch is in middle.

Think of this process of writing a cursive "e". The finished process should look like a gathered bow! Staple the center and cut ribbon tail 16" from middle of bow.

Cut tab for middle

Step 5

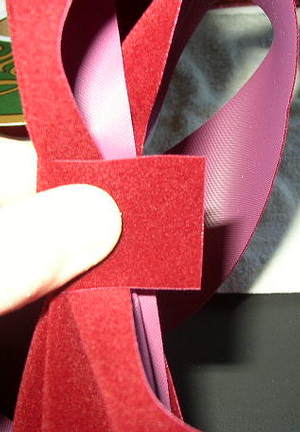
To form the bow's middle piece, we will cut a 6" piece off of the ribbon roll and then fold it in two (lengthwise)...cut in center where piece was folded. This will create the tabs for bow's middle. The extra cut can be used for another bow.


Finish tab by stapling it in the back

Step 6

Take tab and fold it around bow's center. The center of tab will be on front of bow. The edges of the tab will meet in back and then tucked in and stapled to create a clean finish.

Work tie wrap in center of bow and tab

Step 7
(This step will show how to insert the tie wrap so that you can attach bow to your project.)

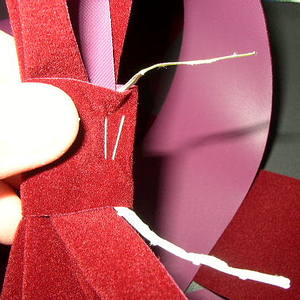
With back of bow towards you, take the tie wrap and work it through the folds of the bow and the tab. The staple in the tab will hold the tie wrap securely in place.

Tie wrap in bow

Step 8

This is a picture of the tie wrap completely inserted through the bow and tab.

You're Finished!

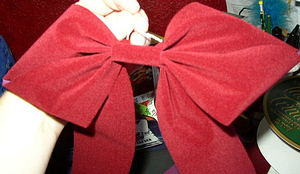
Finished Bow

Now you have a simple holiday bow! Use tie wrap to put on your projects...you can sew or hot glue holiday buttons or embellishments on the center of bow to make it stand out even more!

Good luck with the project and Happy Holidays!


To ask questions or have comments about this project, please email us at: projects@peaydesigns.com. If you have tried this project (as shown above) please let us know! Send pictures to show how yours turned out!!

2003© Peay Designs


<< Previous Contact us: info@peaydesigns.com Next >>